
Configuring Service Provider Metadata in Microsoft ADFS
This procedure describes the steps required for configuring service provider metadata in Microsoft Active DirectoryMicrosoft Active Directory. The directory server that stores information about a variety of things, such as organizations, sites, systems, users, shares, and other network objects or components. It also provides authentication and authorization mechanisms, and a framework within which related services can be deployed. Federation Services (ADFS) for SAMLSecurity Assertion Markup Language. SAML is an XML-based framework for communicating user authentication, entitlement, and attribute information. SAML enables single sign-on by allowing users to authenticate at an identity provider and then access service providers without additional authentication. integration with Aruba Central.
ADFS runs on Windows Servers and provides users with SSOSingle Sign-On. SSO is an access-control property that allows the users to log in once to access multiple related, but independent applications or systems to which they have privileges. The process authenticates the user across all allowed resources during their session, eliminating additional login prompts. access to application services hosted by the trusted service providers.
This topic provides a basic set of guidelines required for setting up the ADFS instance on a Windows Server 2016 as an IdP. The images used in this procedure may change with Windows Server updates.
Before you Begin
- Go through the SAML SSO feature description to understand how SAML framework works in the context of Aruba Central.
- Ensure that the ADFS is installed and available for configuration on a Windows server. For more information, see the ADFS Deployment Guide.
- Ensure that an Active Directory security group is configured and the users are added as group members. For more information, see the ADFS Deployment Guide.
Steps to Configure Service Provider Metadata in ADFS
To enable SAML integration with ADFS, complete the following steps:
To configure Aruba Central and ADFS as trusted partners:
- On Windows Server, click >>. The ADFS administrative console opens.
- Click folder and select from the menu.

- Select .

- Click .
- Enter a . The name entered here will be displayed in the management console and to the users logging in to Aruba Central.
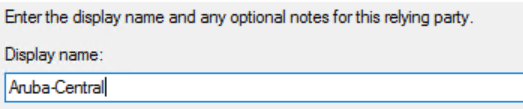
- Click .
- Select and then click .
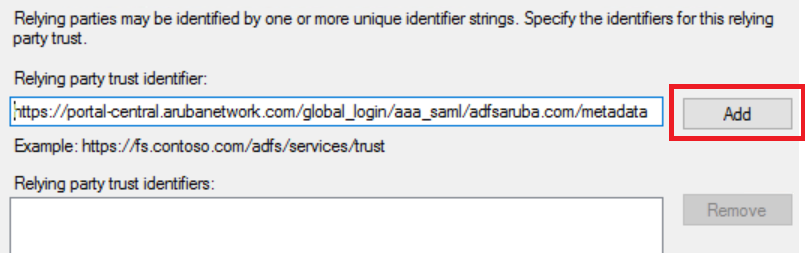
- Select check box and enter the consumer URLUniform Resource Locator. URL is a global address used for locating web resources on the Internet. that you want to use for sending SAML SSO login requests and receiving SAML response from the IdP.

- Click .
- Add Aruba Central URL as the relying party trust identifier.
- Click .
- Select the preferred security setting. You can select option to permit access to all users.
- Click .
- Verify if Aruba Central is added to the list of relying party trust.
The Name ID attribute is used for user identification. For SAML integration with Aruba Central, the Name ID attribute must include the email address of the user. If the Name ID attribute does not return the email address of the user, use the attribute.
To configure the Name-ID attribute:
- Select the display name you just added for Aruba Central and click .
- In the window, click .
- Set the Claim Rule template to .

- Click .
- In the text box, enter .
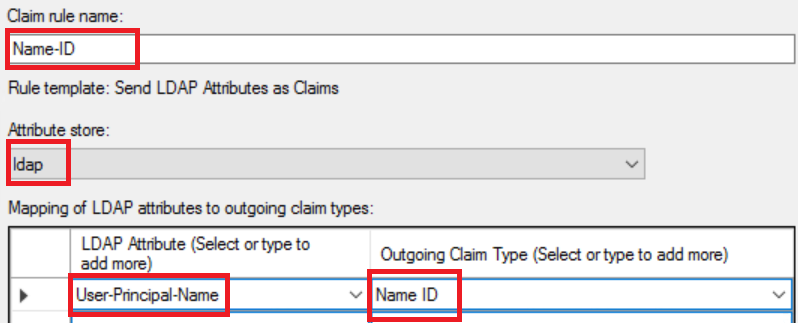
- Select the LDAPLightweight Directory Access Protocol. LDAP is a communication protocol that provides the ability to access and maintain distributed directory information services over a network. as the .
- Select the as LDAP attribute and for the
- Click .
To create a rule with the customer ID attribute:
- In the window, click .
- To send a claim based on a user's Active Directory group membership, set the Claim Rule template to .

- Click .
- In the text box, enter the customer ID attribute. For example, .
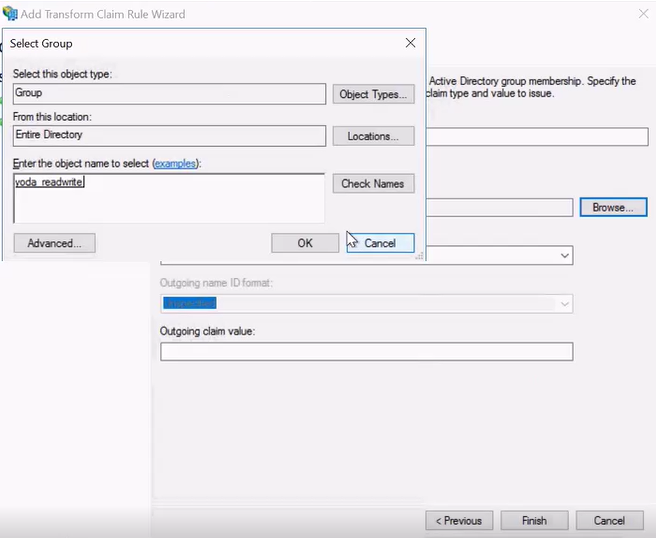
- Select a user group.
- Click .
- Select a customer ID attribute for the and enter a value for the .
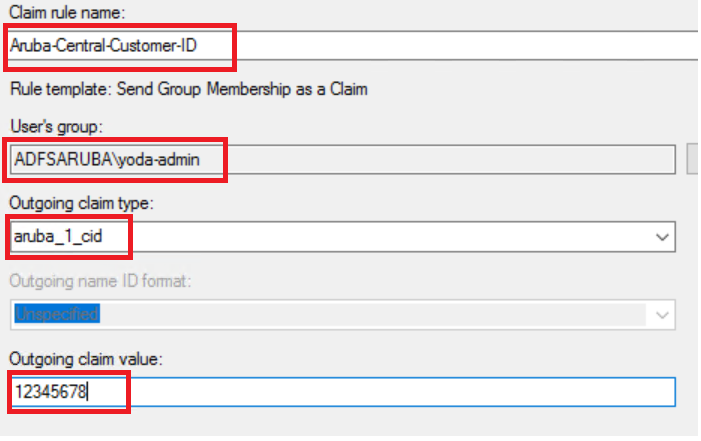
- Click .
- If you have multiple customers, define the customer ID attribute separately for each customer ID.
To add a rule for the application attribute:
- In the window, click .
- To send a claim based on a user's Active Directory group membership, set the Claim Rule template to .
- Click .
- In the text box, enter the application attribute. For example, .
- Select a user group.
- Select the application attribute for and enter a value for the
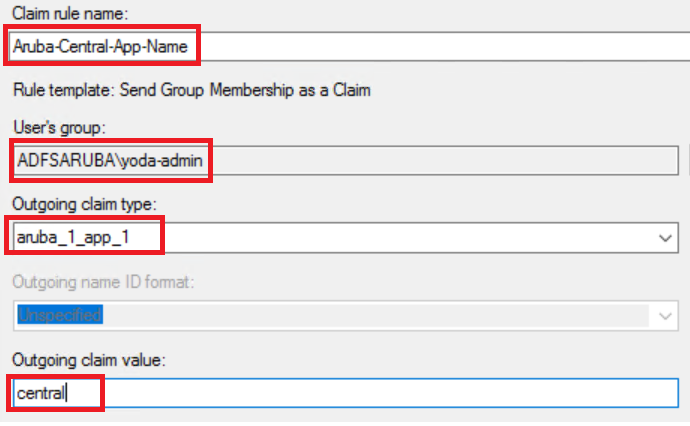
- Click .
To add a rule for a role attribute:
- In the window, click .
- To send a claim based on a user's Active Directory group membership, set the Claim Rule template to .
- Click .
- In the text box, enter the application attribute. For example, .
- Select a user group.
- Select the role attribute for and enter a value for the
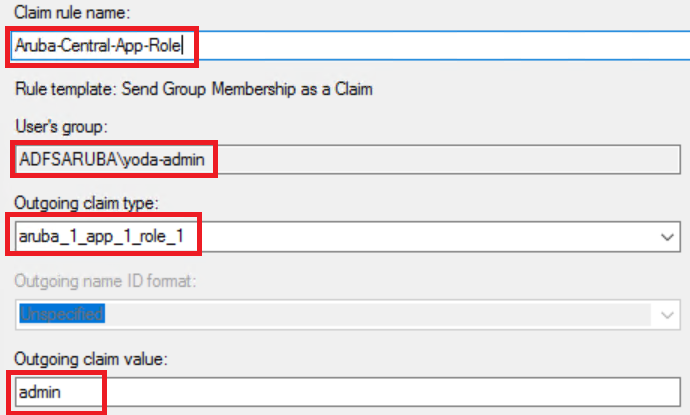
- Click .
If the role attribute is not configured, Aruba Central assigns a read-only role to the user.
If you want to restrict user access to a group in Aruba Central, you can configure the group attribute. If the group attribute is not configured, Aruba Central allows SAML SSO users to access all groups.
To add a rule for a group attribute:
- In the window, click .
- To send a claim based on a user's Active Directory group membership, set the Claim Rule template to .
- Click .
- In the text box, enter the application attribute. For example, .
- Select a user group.
- Select a group attribute for and enter a value for the
- Click .
To enable IdP-initiated logout:
- Select the relying party trust entry created for Aruba Central and click .
- Click .
- To add a logout URL, click .
- Select the endpoint type as .
- Select for .
- Enter the Aruba Central logout URL for .
- Enter the IdP logout URL for .

- Click .
The token-signing certificate is required SAML authentication. To export the token-signing certificate:
- In the ADFS management console, go to >>.
- Click the certificate under Token-signing and select from the contextual menu.
- Click >.
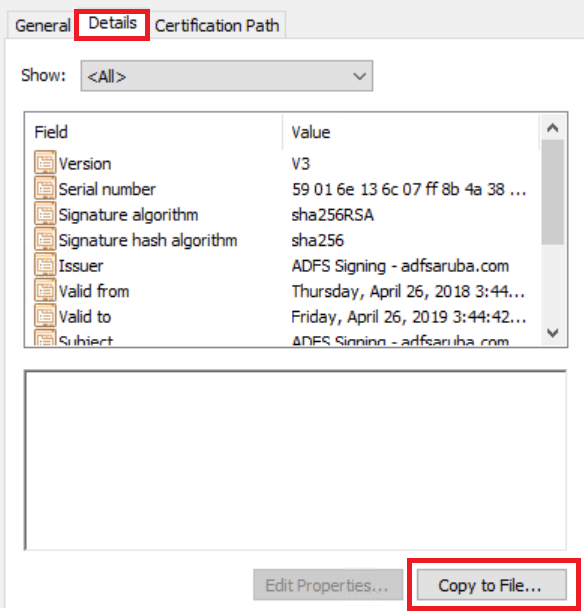
- Click and select as the certificate format.
- Click .
- Save the certificate file on your local directory.
For information on how to configure a SAML authorization profile, see Configuring SAML Authorization Profiles in Aruba Central.
