Customizing the Floor Plans View
To customize your floor plan view, click the tab on the right sliding panel. The tab displays the list of devices.
- Click to view the details of the access point and the RFRadio Frequency. RF refers to the electromagnetic wave frequencies within a range of 3 kHz to 300 GHz, including the frequencies used for communications or Radar signals. environment.
- Click to view the client details.
- Click to view the rogue details.
The navigation menu on the right pane consists of the , , and tabs. The following table describes the menu options available for a floor:
|
Tabs |
Options |
|---|---|
|
|
The tab has the following menu options: —Displays the total number of APs, the planned APs, and the number of APs that are offline. —Displays the floor name. —Displays the floor number. —Displays the current width of the floor plan. To change these settings, click the icon and measure a portion of the floor. —Displays the current height of the floor plan. To change these settings, click the icon and measure a portion of the floor. —Displays the grid. Decreasing the grid size enables the location to place clients in a small grid which increases accuracy. —Allows you to set the values to indicate if the environment is related to an office space, cubicles, offices, or concrete. |
|
|
The tab has the following menu options: —Displays APs, clients, and rogue devices detected on the floor. —Shows the heatmap for the current and adjacent floors. —Displays the following details: —Allows you to change the grid size and color. —Shows or hides the labels tagged to the devices on the floor. —To ensure that multi-floor heatmaps display properly, ensure that your floor plans are vertically aligned. use the origination point for this alignment. By default, the origin appears in the upper left corner of the floor plan. You can drag and drop the origin point to the correct position. —Displays the regions defined within a floor plan. For example, you can define two small regions of high density clients within a larger floor plan with lower client density. —Displays walls drawn on the floor. |
|
|
The tab has the following menu options: —Allows you to draw a region or wall for the floor. —Allows you to add and delete the already deployed or planned devices. —Displays the following options: —Selects all floors. —Exports the floor plan of a specific floor. —Cancels the previous action. —Allows you to create a new floor plan. —Automatically matches the devices that are planned for deployment and reloads the page. —Allows you to navigate to the floor above. —Allows you to navigate to the floor below. —Refreshes the page. —Allows you to replace the current background. |
User Interface Elements of the Dashboard
The dashboard provides various options to customize your view. The customizable parameters include:
|
UI Element |
Description |
|---|---|
|
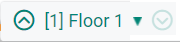
|
Click the drop-down to select a specific floor from the site. |
|
|
Click any of the AP to view the details of the access point and the RF environment in the window. |
|
|
Click any of the clients to view the client details in the window. |
|
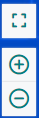
|
Click the or icon to zoom in or zoom out of a floor plan. Additionally, click the box icon to view the floor plan in full screen mode and click the inward box icon to exit the full screen mode. |
|
|
Click the home icon to reset the floor plan view. |
|
|
Click the eye icon to view the floor plan settings. The window includes the following information:
—Shows or hides the deployed access points in the floor plan. —Shows or hides the planned access points in the floor plan. —Shows or hides the rogue access points in the floor plan.
—Shows or hides the deployed air monitors in the floor plan. —Shows or hides the planned air monitors in the floor plan.
—Shows or hides the clients in the floor plan.
—Shows or hides the strength of RF coverage in each location. —Select the check box to select either the monochrome display or the colored display of heatmaps. and —Select the check box to show or hide the strength of RF coverage for 2.4 GHzGigahertz. and 5 GHz APs. —Select the check box to view the segregation of regions in the selected floor. —Shows or hides the segregation of walls in the selected floor. —Shows or hides the labels tagged to the devices on the floor. and —shows the dimensions in feet or meters. |
|
|
Allows you to search for APs, Clients, and Rogues. |
|
|
Click the edit icon to edit or modify the floor plan properties. |