
Onboarding AOS-CX VSF Stack to Aruba Central (on-premises)
The following figure illustrates the provisioning steps for each group type for a VSF stack.
Figure 1 Stack Provisioning Steps Per Group Type
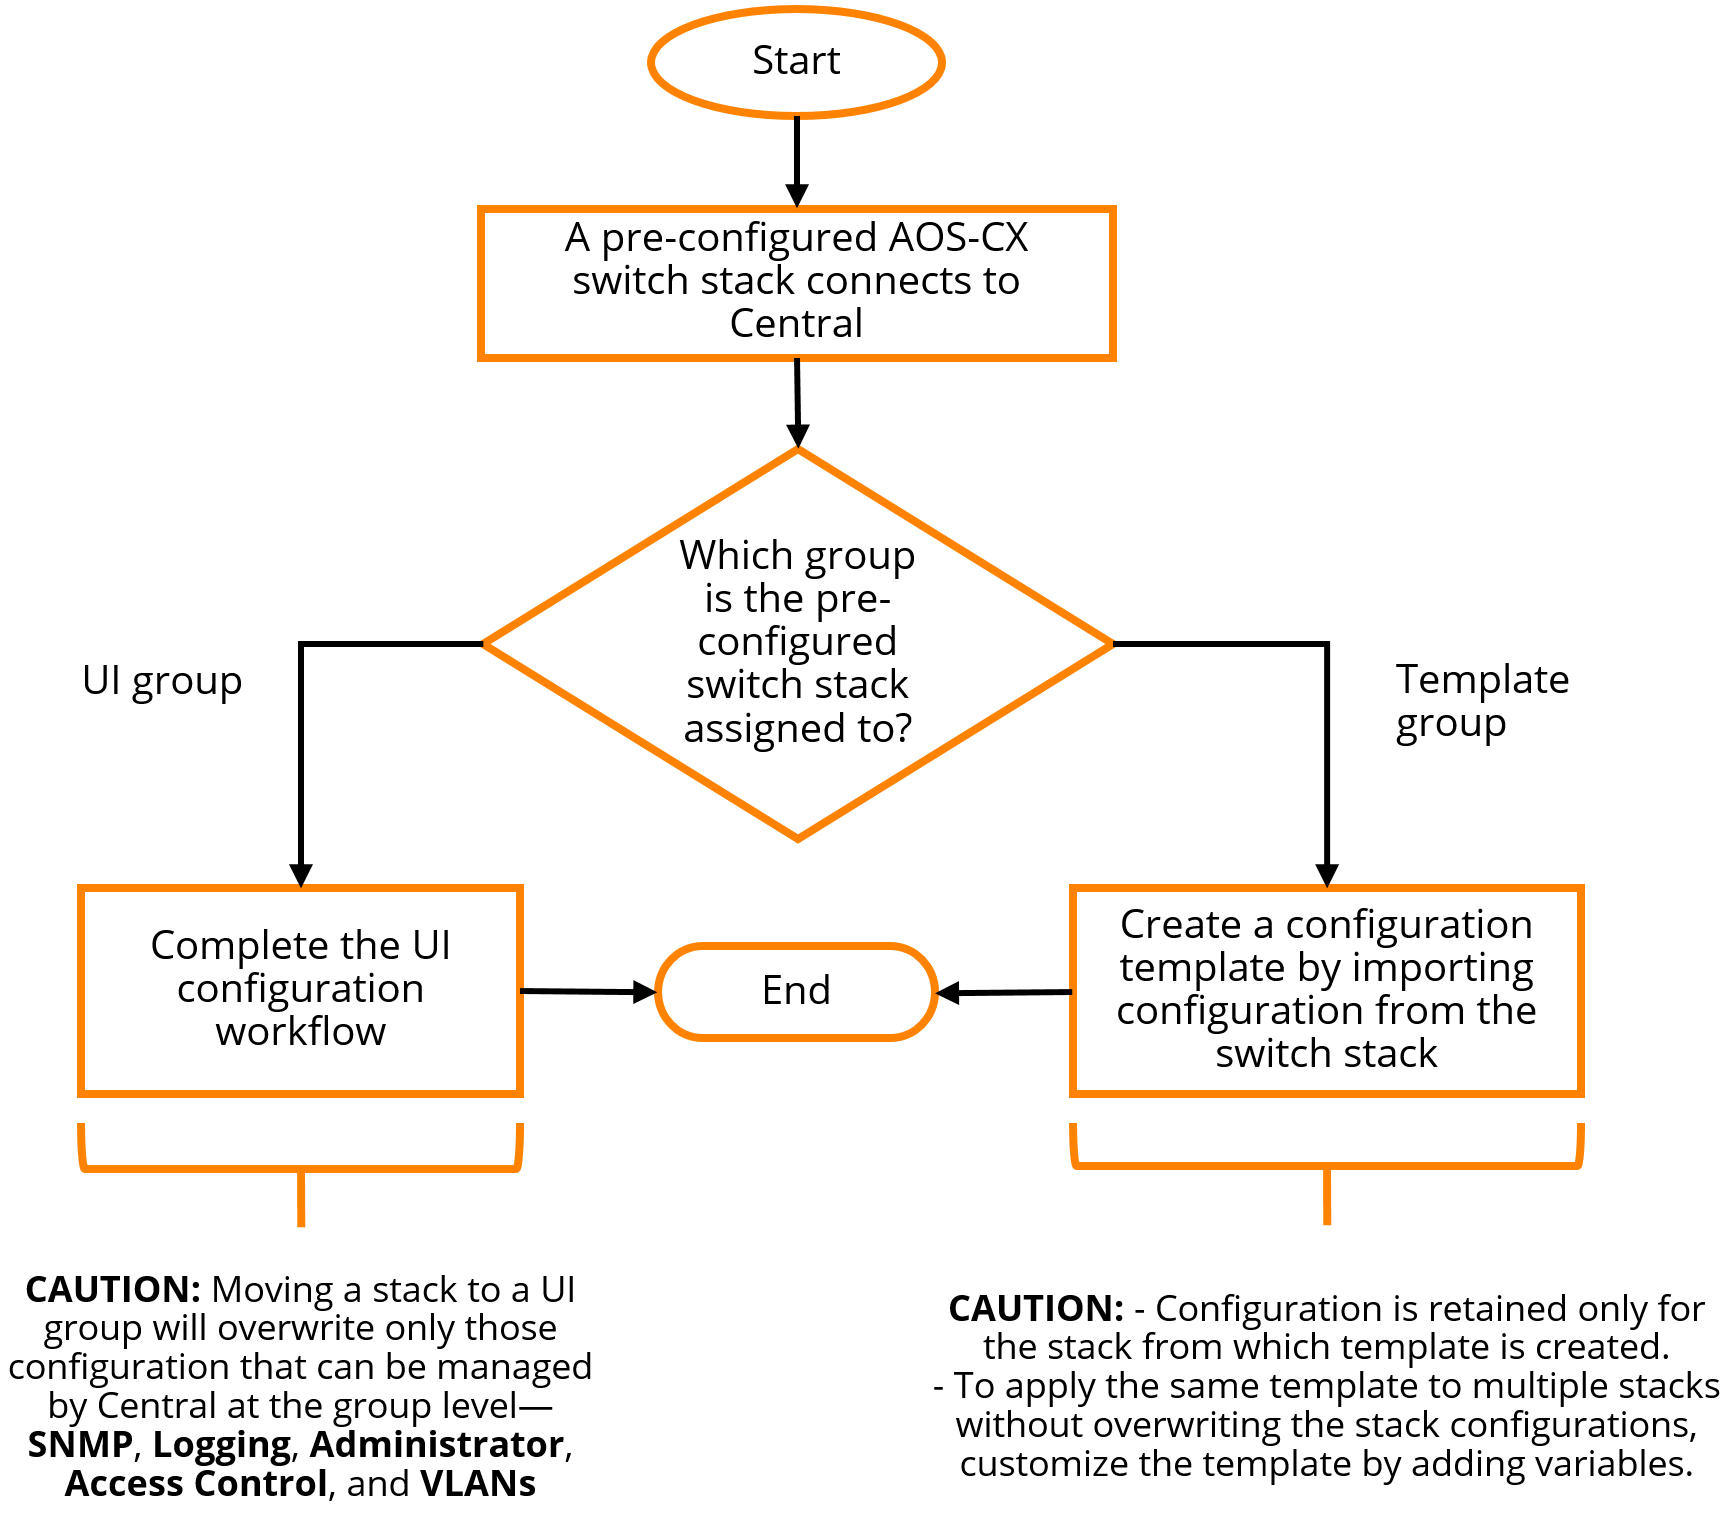
When moving a pre-configured stack to a UI group, Aruba Central configuration at the group level will overwrite configuration on the switch. Before moving a pre-configured stack to a UI group in Aruba Central, if you want to preserve any group-level configuration that is present on the stack, you must configure them at the group level in Aruba Central. However, since multiple stacks can be managed using the same UI group, if you do not want any particular configuration on some stacks, you must delete them at the device level in Aruba Central.
For example, if you want to preserve the VLANsVirtual Local Area Network. In computer networking, a single Layer 2 network may be partitioned to create multiple distinct broadcast domains, which are mutually isolated so that packets can only pass between them through one or more routers; such a domain is referred to as a Virtual Local Area Network, Virtual LAN, or VLAN. 20, 30 on stack1 and VLANs 40, 50 on stack2, then you must configure VLANs 20, 30, 40, and 50 at the group level in Aruba Central. After moving the stacks to the UI group, you must delete VLANs 40, 50 on stack1 and VLANs 20, 30 on stack2.
- Configurations supported at the group level for a stack—SNMPSimple Network Management Protocol. SNMP is a TCP/IP standard protocol for managing devices on IP networks. Devices that typically support SNMP include routers, switches, servers, workstations, printers, modem racks, and more. It is used mostly in network management systems to monitor network-attached devices for conditions that warrant administrative attention. , Logging, Administrator, Access Control, VLANs, and other features available at the group level
- Configurations supported only at the device level for a stack—, , , , , , and
To onboard an AOS-CX VSF stack to Aruba Central (on-premises), complete the following steps:
- Setup the switch stack using the Aruba CX mobile application or the CLI.
This step must be performed outside Aruba Central (on-premises).
For information , see ArubaOS-CX VSF Best Practices. Although this document is created for Aruba CX 6300 switches, it is also applicable to Aruba 6200 switches.
If you want to create a new stack with devices that are already present in Aruba Central (on-premises), you must first disconnect and delete all these devices from Aruba Central (on-premises) and then convert them as conductor, standby, and members. For information about deleting offline switches from Aruba Central (on-premises), see Deleting an Offline Switch.
- Add and subscribe the conductor, standby conductor, and all members in the AOS-CX stack to Aruba Central (on-premises). The other members are optional to be added to Aruba Central (on-premises).
For information on adding and subscribing devices, see Onboarding Devices.
- Create a template group or UI group for the AOS-CX VSF stack in Aruba Central (on-premises).
In the template group, all user-defined template variables for the conductor and standby devices should contain the same values, to ensure template consistency after a stack failover event. For information on variables for template-based configuration, see Managing Variable Files.
- Assign the stack members to the template group from any of the following pages:
- page under in .
- page under > in the app.
For more information on assigning a stack, see Assigning Devices to Groups.
You can move a stack across different UI groups or template groups.
- To push switch configurations to the conductor and members in the AOS-CX VSF stack from Aruba Central (on-premises), use one of the following ways:
- Template group—Create a configuration template in the template group for the AOS-CX VSF stack in one of the following ways:
- Copy the details of the show running config command of the AOS-CX VSF stack from the conductor and paste it in the template.
Ensure to update the password in plaintext.
- Use the Import Configuration As Template option.
The switches must be running AOS-CX 10.06 or a later version.
- Copy the details of the show running config command of the AOS-CX VSF stack from the conductor and paste it in the template.
- UI group—Use UI options and MultiEdit mode in the AOS-CX switch configuration dashboard.
Before moving the stack to a UI group in Aruba Central (on-premises), save the output of the
show running configcommand from the conductor. This is required to restore or apply any configuration that might be lost because of group-level overwrite of configuration. You can apply this configuration after moving the stack to the UI group using the Edit Config option in the MultiEdit mode.The UI options and MultiEdit mode are available only when the AOS-CX VSF stacks are added to a UI group. For more information, see Configuring AOS-CX Switches in UI Groups.
- In Aruba Central (on-premises), select the serial number of the conductor switch to push switch configuration to the conductor, standby conductor, and all members in the stack.
- Port-specific configurations such as , , , , , , and can be configured on stack members only at the device level.
- It is not recommended to perform any stacking-related configurations, such as setting up a stack, using the MultiEdit mode.
- Template group—Create a configuration template in the template group for the AOS-CX VSF stack in one of the following ways:
- To make stack-topology changes, use one of the following ways:
- Template group—Update the configuration template in the template group for the AOS-CX VSF stack.
- UI group—Use the page in the AOS-CX configuration dashboard.
The UI options are available only at the group-level.
This step is applicable only for the switches running AOS-CX 10.07 or later firmware versions.
