Getting Started with Aruba Switch Deployments
Before you get started with your onboarding and provisioning operations, browse through the list of Aruba switches supported in Aruba Central.
Provisioning Workflow
The following sections list the steps required for provisioning switches in Aruba Central.
Provisioning a Factory Default Switch
Like most Aruba devices, Aruba Switches support ZTPZero Touch Provisioning. ZTP is a device provisioning mechanism that allows automatic and quick provisioning of devices with a minimal or at times no manual intervention.. Switches with factory default configuration have very basic configuration for all ports in VLANVirtual Local Area Network. In computer networking, a single Layer 2 network may be partitioned to create multiple distinct broadcast domains, which are mutually isolated so that packets can only pass between them through one or more routers; such a domain is referred to as a Virtual Local Area Network, Virtual LAN, or VLAN.-1. When a new switch (factory default) is powered on, it automatically obtains IP address, connects to Aruba Activate and downloads the provisioning parameters. When the switch identifies Aruba Central as its management entity, it connects to Aruba Central.
To manage switches from Aruba Central, you must onboard the switches to the device inventory and assign a valid subscription.
For step-by-step instructions, see Step 1: Onboard the Switch to Aruba Central.
Provisioning a Pre-configured or Locally-Managed Switch
Pre-configured switches have customized configuration; for example, an additional VLAN or static IP address configured on the default.
Unlike factory default switches, locally managed switches and the switches with custom configuration require one touch provisioning. These switches do not automatically identify Aruba Central as their management platform, therefore you must manually enable the Aruba Central management service on these switches to allow them to connect to Aruba Central.
For step-by-step instructions, see Workflow 1—Pre-Provisioning a Switch.
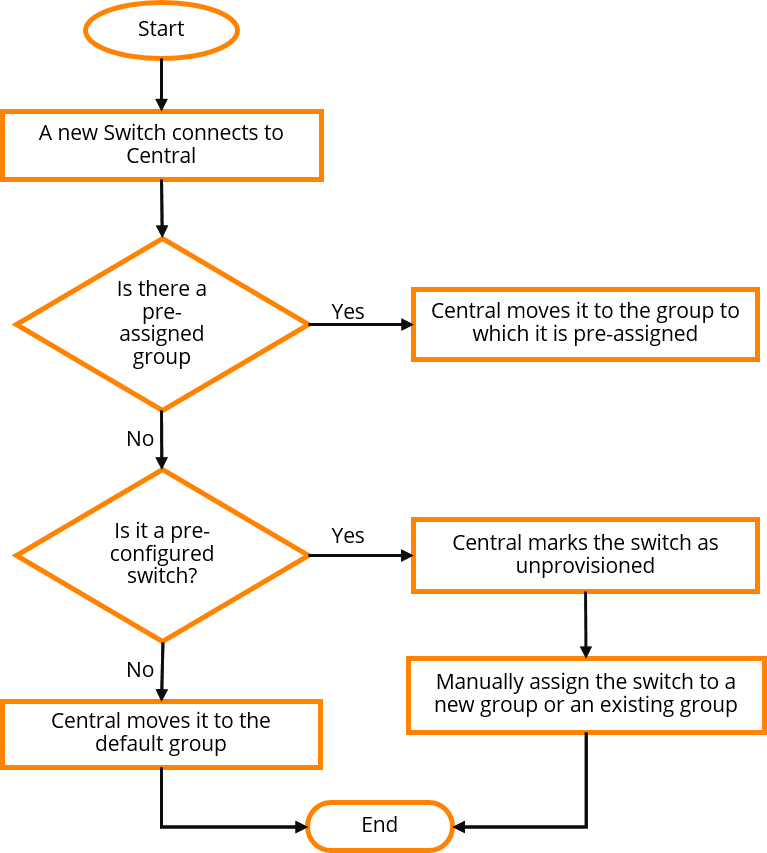
Group Assignment
Aruba Central supports provisioning switches in one of the following types of groups:
UI group—Allows you to customize and manage device parameters using the UI workflows, that is, the menu options and knobs available under .
Template Group—Allows you to configure devices using CLI-based configuration templates.
Configuration and Management
Aruba Central supports managing switch configuration using UI workflows or configuration templates. Based on your configuration requirements, ensure that you assign switches to either UI group or template group.
For more information on managing switches in Aruba Central, see the following topics:
Switch Monitoring
To view the operation status of switches and health of wired access network:
1. In the Network Operations app, use the filter to select a group that has switches.
2. Under Manage, click Devices > Switches.
For more information, see Monitoring Switches and Switch Stacks.
Troubleshooting and Diagnostics
The page under > > in the Aruba Central UI displays errors in configuration sync, templates, and a list of configuration overrides. For more information, see Verifying Device Configuration Status.
To troubleshoot switches remotely, use the troubleshooting tool available under > > . For more information, see Using Troubleshooting Tools.
Was this information helpful?
Great! Thanks for the feedback.
Sorry about that! How can we improve it?Please send your comments and suggestions