
Replacing an AP
Aruba Central (on-premises) now supports an access point (AP) replacement workflow. The AP can be replaced through the Aruba Central (on-premises) web interface using the following page:
- AP Summary page—In the AP dashboard, navigate to .
After the AP is replaced, the group, label, and site parameters are inherited by the new device and the old AP is removed from the monitoring view.
Important Points to Note
- Before starting the procedure, the device that has to be replaced must be offline.
- The model number of the old AP and the new AP must be the same. For example, an AP-505 access point must be replaced with an AP-505 access point.
- The new AP must be part of the device inventory.
- The new AP gets licensed and inherits the group, label, and site name, if any.
- The new AP does not inherit any configuration from old AP.
- The old AP is deleted from the monitoring view only after the validation process is complete. This validation process takes about 15 minutes.
- Monitoring data of the old AP is retained for three months.
- After the device is replaced, the old AP is removed from the device inventory.
Replacing an AP from the Summary Page
To replace an AP from the summary page, complete the following steps:
- In the app, set the filter to .
The dashboard context for the selected filter is displayed. - Under , click > .
A list of APs is displayed in the view. - Click to view a list of offline APs in the table.
- In the column, click the AP that you want to replace.
The page is displayed in the AP dashboard. - In the drop-down list, click .
- In the pop-up window, click .
- In the page, do the following:
- Select a replacement AP and click :
The following image displays the window:
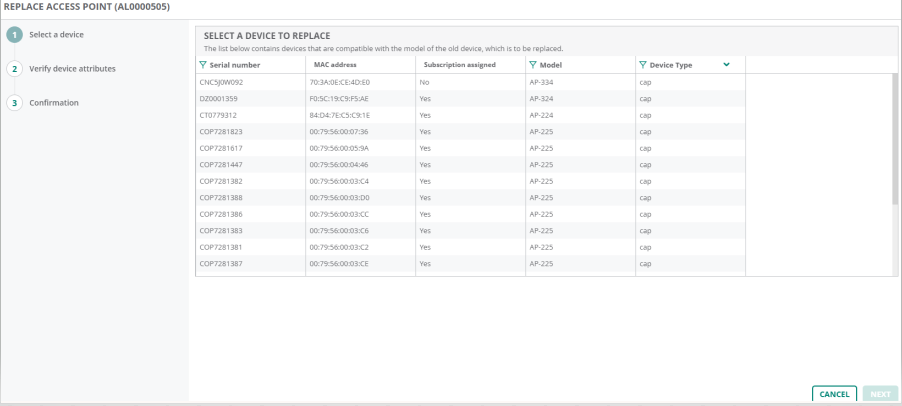
- Verify the attributes and click . The following attributes are displayed:
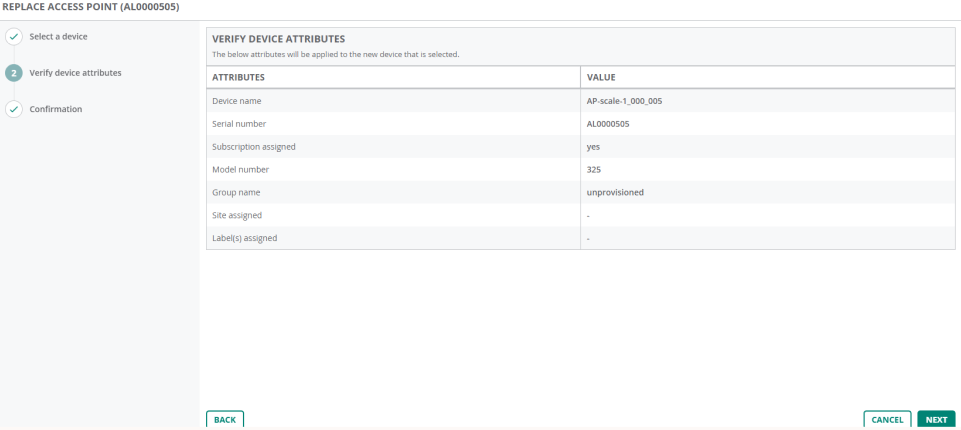
Parameters
Description
Device name
The device name of the new AP.
Serial number
The serial number for each AP is a unique value. The serial number reflects the value of the new AP.
Subscription assigned
The new AP is assigned the same subscription as the old one. For example, if the old AP had a Foundation license, the new AP is assigned the same Foundation license.
Model number
The model number of the new AP.
Group name
The group name is inherited from the old AP.
Site assigned
The site is inherited from the old AP.
Label(s) assigned
The label(s) is inherited from the old AP.
- In the page, review the old and new device details and click .
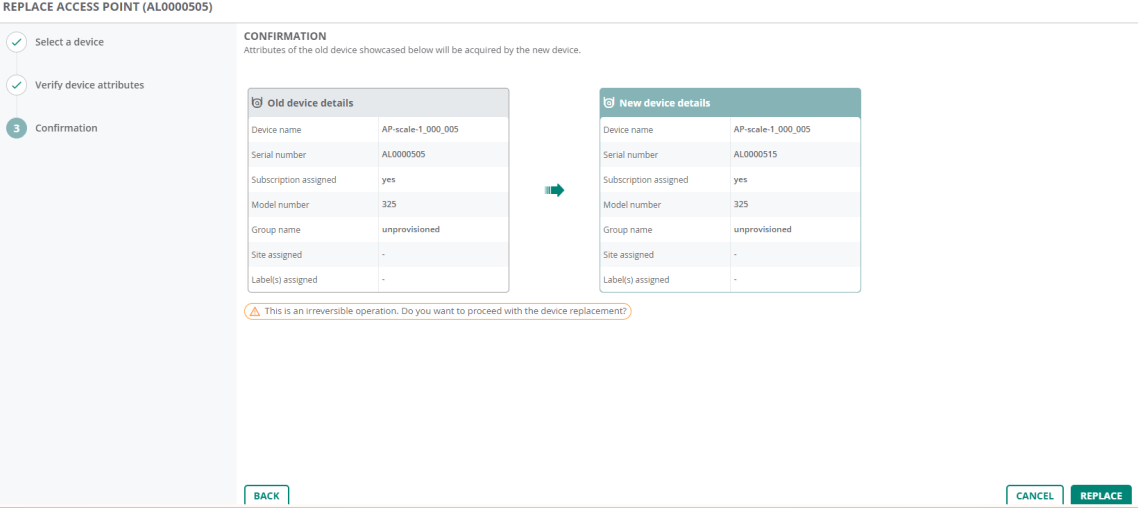
- In the pop-up window, click to continue the workflow.
- Select a replacement AP and click :
- In the page, a progress bar displays the device replacement status. Hover over the progress bar to view more details.
- Optionally, hover over the progress bar and click if you wish you discontinue replacing the device:
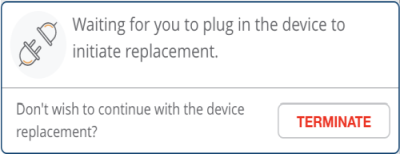
If the device replacement process fails, click to end the procedure and retry.
- Connect the new AP.
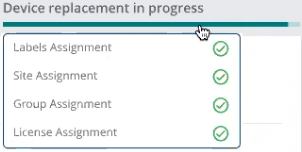
The status in the progress bar changes to: Device replacement in progress. Hover over the progress bar to view more details:
The following image displays the status of the device replacement:
- Navigate to the AP page of the new device.
- In the app, set the filter to .
The dashboard context for the selected filter is displayed. - Under , click > .
A list of AP is displayed in the view. - Click to view a list of online APs in the table.
- In the column, click the new AP.
The page is displayed in the AP dashboard. - In the section, you can view the following details:
- AP Model
- Country Code
- MACMedia Access Control. A MAC address is a unique identifier assigned to network interfaces for communications on a network. Address
- Serial Number
- Last Seen
- Last Reboot Reason
- Firmware version
- Configuration Status
- BandBand refers to a specified range of frequencies of electromagnetic radiation. Selection
- Power Negotiation
- Group
- Labels
- Site
- In the app, set the filter to .
- The page displays all the logs generated during the device replacement process. To view the logs, set the filter to . Under , click .
- The table is displayed.
